Okay, so let me just start with a little honesty here—I did not grow up with dulce de leche. I wish I could say I had a grandma who made it from scratch while soft music played in the background, but nope. My first encounter with it was in college when a friend brought back a tin from Argentina. One spoonful in, and my brain kinda short-circuited. Like… what is this magic?
Fast forward a few years, and now I’m that person making Dulce de Leche Squares on repeat—especially when I need a quick dessert that feels fancy but comes together with pantry basics. These are chewy, gooey, buttery, and honestly… a little dangerous. You’ve been warned.
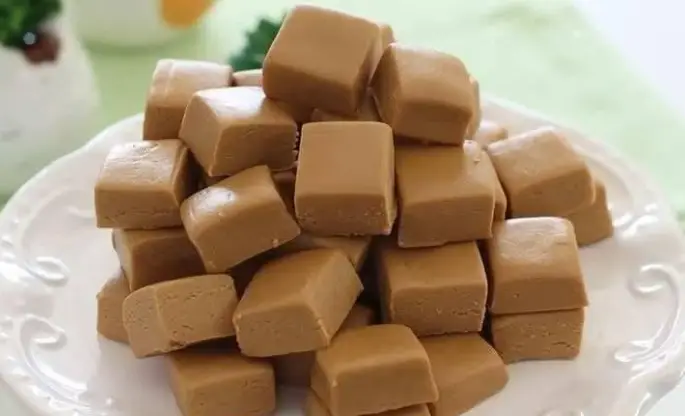
What Are Dulce de Leche Squares?
Alright, so if you’re not familiar, let’s break it down real quick. These squares are basically dessert bars with a buttery shortbread-like base, and they’re topped with creamy, caramel-like dulce de leche. Some folks add a crumble topping, a drizzle of chocolate, or even sea salt flakes (which I totally recommend, by the way).
Dulce de leche is like caramel’s smoother, milkier cousin. It’s made by slowly heating sweetened condensed milk until it turns into this golden, silky dream. You can make it from scratch (takes a couple hours), or you can do what I do: grab a can from the international aisle or Latin food section of your local grocery store. Easy peasy.
Ingredients You’ll Need (Pantry Vibes Only)
You won’t need any fancy equipment or hard-to-find stuff here. Just some basics:
- 1 cup unsalted butter (softened)
- 1/2 cup sugar
- 1/4 tsp salt
- 1 tsp vanilla extract
- 2 cups all-purpose flour
- 1 can (13.4 oz) dulce de leche
- Optional: sea salt flakes, mini chocolate chips, or crushed pecans
Honestly, the toppings are where you can get creative. I’m a sucker for the sweet-salty combo, so I go hard on the flaky salt. But hey, live your truth.
How to Make Dulce de Leche Squares (No Fancy Tricks)
Let’s keep it super chill. This is one of those dump, bake, chill, slice situations.
1. Preheat the oven
Crank it up to 350°F. Line an 8×8-inch baking pan with parchment paper (leave some overhang so you can lift it out later).
2. Make the crust
In a big bowl, cream together the softened butter and sugar. Add the vanilla and salt, then slowly mix in the flour. The dough will be a little crumbly—kind of like wet sand, but stickier.
Press the dough into your pan, spreading it evenly. I use the back of a spoon or a flat measuring cup to press it down smooth.
3. Bake the base
Pop it into the oven for about 20 minutes, or until the edges just start to go golden. It’s gonna smell amazing.
4. Add the dulce de leche
Let the base cool for 5 minutes, then spread the dulce de leche on top. It’ll be thick, so if your can is cold, microwave it for 20–30 seconds to make spreading easier.
5. Add toppings (if you’re into that)
Now’s the time for those sea salt flakes or mini chips. Do you. I won’t judge if you dump the whole bag on there. (Okay maybe just a little.)
6. Chill & slice
This is the hard part: let it cool completely. I usually stick it in the fridge for an hour or two. Once it’s set, lift it out of the pan and cut into squares. I go with 16 little ones so I feel less guilty about grabbing two… or five.
Real Talk: Why These Bars Are Always a Hit
Here’s what makes these bars so popular—especially with American dessert lovers:
- They travel well. Potlucks, bake sales, or picnics? These bars don’t melt or fall apart.
- They hit that sweet spot (literally) between cookie and candy.
- They look way fancier than they are. People always think I spent hours. I did not.
- They’re super rich, so a little goes a long way… unless you’re me at 10 p.m. standing in front of the fridge.
My Go-To Dulce de Leche Hack
Okay, if you wanna make your own dulce de leche at home and feel like a kitchen boss, here’s how:
Take a can of sweetened condensed milk, peel off the label, and place it in a pot of water (make sure the can is covered by at least an inch). Bring it to a boil, then reduce to a simmer for about 2.5 to 3 hours. Keep adding water as needed.
Cool it completely before opening (seriously, do not try to open it hot), and boom—homemade dulce de leche. It’s worth it if you’ve got the time.
But hey, no shame in the store-bought game. That’s what I use 90% of the time.
Make It Your Own: Flavor Ideas That Slap
Wanna take your squares to the next level? (Oops, I mean make them even better—no fancy words allowed here!) Try these ideas:
- Add a chocolate ganache layer on top of the dulce de leche
- Mix cinnamon or espresso powder into the base for a flavor twist
- Sprinkle toasted coconut or chopped hazelnuts
- Use a graham cracker crust for a totally different texture
Honestly, there’s no wrong way to make these. The key is just to let the dulce de leche shine.
When to Serve Dulce de Leche Squares
Look, you don’t need a reason—but if you do, these are perfect for:
- Holiday dessert trays (they freeze well!)
- Birthday parties when you don’t want to deal with frosting
- Movie night treats that feel fancier than popcorn
- Or let’s be real—Wednesday nights when you just need a pick-me-up
Final Thoughts from My Kitchen to Yours
If you’re anything like me, you’ll end up keeping a can of dulce de leche in your pantry at all times “just in case.” These squares are that good. They’re quick, simple, and taste like you spent way more time on them than you actually did.
I always say, dessert should make people smile—and when you bring out a tray of these bars, trust me, people light up. Especially when you tell them you made ‘em yourself (don’t worry, I won’t tell them how easy it really was).