Okay, real talk—how many times have you pulled out all your ingredients, got halfway through a recipe, and boom…no sweetened condensed milk in the pantry? If you’re anything like me, it’s always when I’m knee-deep in baking something sweet. That tiny can is easy to forget but always crucial when you’re trying to whip up something like fudge, key lime pie, or, let’s be honest, those dangerously addictive magic cookie bars.
That’s exactly how I learned to make it from scratch. And let me tell you, once you do it homemade? You’re not going back to the canned stuff unless it’s an absolute emergency.
Why Make Sweetened Condensed Milk at Home?
Besides the obvious “ran out and don’t wanna run to the store” situation, homemade sweetened condensed milk is just…better. It’s richer. Creamier. And you can tweak the sweetness or texture depending on what you’re using it for.
Oh, and no weird additives. No thickeners. Just good ol’ pantry basics doing their thing.
What You Need (Spoiler: You Probably Already Have It)
This is one of those recipes that’s so simple it kinda feels like cheating.
Here’s the classic version:
- 1 cup whole milk
- 1 cup granulated sugar
- 2 tablespoons butter
- 1/2 teaspoon vanilla extract (optional, but I love the flavor it adds)
That’s literally it. No condensed magic powder. No evaporated milk. No drama.
Let’s Make It (No Fancy Tools Needed)
Alright, roll up your sleeves—this takes about 30–40 minutes, mostly simmering time.
Step-by-step:
- Mix it up: Combine milk and sugar in a small saucepan over medium-low heat. Stir until the sugar fully dissolves. You don’t want gritty sugar hanging around.
- Simmer low and slow: Let it gently simmer. Stir occasionally so nothing sticks to the bottom. No boiling—keep it chill. We’re thickening, not making caramel.
- Add the butter: After 20 minutes or so, toss in the butter. This gives it that thick, glossy texture and adds richness. Stir it in and let it keep cooking.
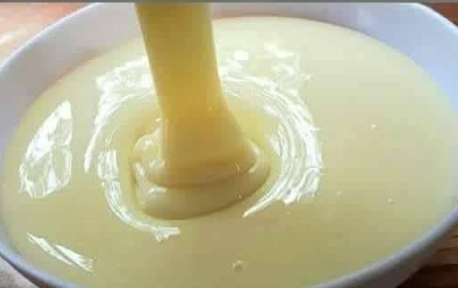
- Watch it thicken: Keep simmering until it reduces by about half. It should coat the back of a spoon and look syrupy, but not watery.
- Vanilla time (optional): Once it’s off the heat, stir in the vanilla if you’re using it.
- Cool down: Let it cool a bit before pouring into a clean jar. It’ll thicken more as it chills.
Pop it in the fridge and it’ll keep for up to a week. I usually label mine with the date using a little masking tape—yes, I’m that person.
My First Time Making It (And Totally Messing It Up)
Alright, confession time. The first time I tried making sweetened condensed milk at home, I was in a serious baking frenzy. I’d promised a batch of coconut macaroons for a family BBQ, totally forgot the canned stuff, and figured—how hard could it be?
Spoiler: I cranked the heat way too high. Sugar burned. Milk curdled. The kitchen smelled like a bonfire made of sour milk and sadness.
But the second time? I took it slow. Watched the heat. And it turned out perfect. Creamy, thick, with just enough sweetness to bring everything together.
Since then, I always have a jar in the fridge—especially around the holidays when I’m baking nonstop.
What Can You Use It For?
This stuff goes way beyond pie filling. If you’ve got a jar on hand, here are a few tasty ways to put it to work:
- Coffee sweetener – Give your iced coffee or cold brew a creamy, sweet kick.
- Popsicles or no-churn ice cream – Yep, sweetened condensed milk makes homemade ice cream dreamy and scoopable.
- Fudge – The rich, silky kind that sets perfectly every time.
- Magic bars – You know, graham cracker crust + chocolate chips + coconut + sweet gooey heaven.
- Drizzle on fruit – A little over fresh strawberries? Game changer.
- Vietnamese iced coffee – Bold, sweet, and so satisfying.
Honestly, I’ve even eaten it by the spoonful straight from the jar. No judgment. It’s that good.
Quick Tips for Success
Just a few things I’ve learned from making this a dozen times:
- Don’t rush the simmer: Low and slow is key. If you boil it, you’ll risk curdling the milk or scorching the sugar.
- Stir occasionally: You don’t need to babysit it nonstop, but don’t walk away and forget it either.
- Use whole milk: Skim milk doesn’t cut it here. You need the fat for that smooth, rich texture.
- Want it dairy-free? You can make a version with coconut milk and coconut sugar! It’s a little darker in color, but works great for vegan desserts.
Is It Cheaper to Make It Yourself?
Okay, price-wise, a can of sweetened condensed milk usually runs about $1.50 to $2. But when milk and sugar are already in your fridge and pantry? This is a budget-friendly backup that saves a grocery trip—and let’s be real, gas ain’t cheap.
Plus, if you bake often (hi, fellow cookie monsters), making your own lets you whip up just the amount you need. No half-used cans floating around the fridge.
Wrapping It Up (With Sticky Fingers)
So there you have it—homemade sweetened condensed milk that’s simple, satisfying, and honestly better than store-bought. Whether you’re in a pinch or just want to make things from scratch, this one’s a total keeper.
Give it a try this weekend. Heck, throw it into your brownie batter and thank me later. And if you mess it up the first time? That’s part of the fun. We’ve all scorched a saucepan or two along the way.
Got questions? Drop a comment below! Or tell me what you’re making with your batch—I love hearing about everyone’s kitchen experiments.
Until next time, keep it sweet 💛