Okay, let’s be real for a second — anything with melted cheese and crispy edges automatically wins the dinner game, right? These Cheesy Chicken Fritters are one of those recipes you make once, and then it somehow ends up in your weekly rotation. They’re crunchy on the outside, gooey on the inside, and packed with shredded chicken that makes them downright irresistible.
Honestly, if you’ve got some leftover chicken and a little cheese hanging out in your fridge, you’re already halfway there. Let’s talk about how these golden beauties come together and why they’re about to become your new favorite comfort food.
Why Everyone’s Obsessed with Cheesy Chicken Fritters
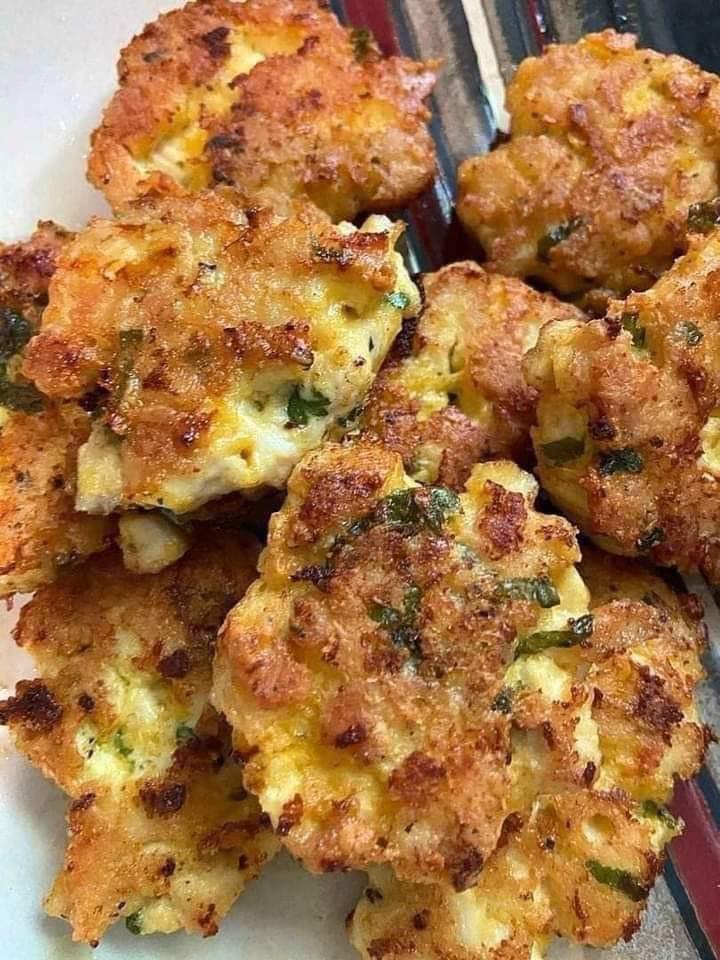
There’s something magical about biting into food that’s both crispy and cheesy. You get that crunch when you first dig in, followed by a cheesy, savory filling that hits all the right notes. These fritters check every box — quick, comforting, and totally snackable.
They’re great for:
- Game nights (they disappear faster than chips)
- Lunchboxes (kids go nuts for them)
- Lazy weeknights when you just want something good without spending an hour in the kitchen
And get this — you don’t need fancy ingredients or a ton of prep time. Just a handful of pantry staples and about 20 minutes, and boom, you’ve got golden perfection.
What You’ll Need
Here’s everything that goes into the magic mix:
- 2 cups cooked chicken, shredded (rotisserie chicken works like a charm)
- 1 cup grated cheese — cheddar for bold flavor or mozzarella for that epic cheese pull
- 1/4 cup chopped green onion (adds a fresh kick that balances the richness)
- 1/4 cup all-purpose flour
- 2 eggs, lightly beaten
- Salt and pepper to taste
- Vegetable oil for frying
That’s it. No complicated ingredients, no extra steps. Just simple stuff that comes together in a seriously satisfying way.
Step-by-Step: How to Make the Perfect Cheesy Chicken Fritters
Alright, apron on. Here’s how it goes down:
1. Mix It Up
Grab a large mixing bowl and toss in the shredded chicken, grated cheese, chopped green onion, and flour. Sprinkle in some salt and pepper — don’t be shy. This is where the flavor builds.
Stir everything together until the mixture looks evenly coated. It should be sticky but not too wet.
2. Add the Eggs
In a smaller bowl, lightly beat the eggs. Then, pour them into your chicken mixture and give everything a good mix. The eggs help bind the fritters together so they hold their shape when fried.
Tip: If the mix feels too dry, add just a spoonful of milk or a tiny bit more egg. You want it to stick together without falling apart.
3. Shape the Fritters
Take small portions of the mixture (about 2 tablespoons each) and roll them into little balls or flatten slightly into patties — whichever you prefer. If you’re making them for kids, go for smaller bite-sized ones.
4. Fry Until Golden
Heat a generous splash of vegetable oil in a frying pan over medium heat. Once it’s hot enough (you’ll know it’s ready when a tiny piece of mixture sizzles instantly), carefully add the fritters.
Fry for about 3–4 minutes per side until they turn beautifully golden brown and crispy. Try not to crowd the pan — give them space to cook evenly.
5. Drain and Serve
Once they’re golden and perfect, place the fritters on a plate lined with paper towels to soak up extra oil.
Now comes the best part — serving!
How to Serve Cheesy Chicken Fritters
You’ve got endless options here, and that’s the fun part. Serve them hot with your favorite dipping sauce — ranch, spicy mayo, barbecue, or even a creamy garlic sauce. They also pair perfectly with a simple side salad or coleslaw for a quick meal.
Feeling fancy? Stack them inside a soft tortilla with lettuce and drizzle some chipotle sauce — boom, you’ve got Cheesy Chicken Fritter Tacos. Or pop them on a toasted bun with pickles and mayo for a next-level fritter sandwich.
Honestly, there’s no wrong way to eat these.
Why This Recipe Works Every Time
There are tons of fritter recipes out there, but this one stands out because it nails the balance between cheesy and crispy. The flour helps hold everything together, the eggs give structure, and the cheese melts perfectly into the chicken.
If you’ve ever had fritters that fall apart or turn soggy, this recipe fixes that. The mix of chicken and cheese creates the perfect bite — juicy, flavorful, and golden all around.
Also, using cooked shredded chicken (especially rotisserie) saves so much time. No need to cook raw meat — just mix and fry. Perfect for busy evenings when takeout is way too tempting.
Quick Tips for Crispy Success
A few small things make a big difference here:
- Don’t rush the fry time. Give each side a solid 3–4 minutes to crisp up.
- Drain them properly. A quick blot on paper towels keeps them from getting greasy.
- Use the right cheese. Cheddar gives sharp flavor; mozzarella gives stretch. Mix both for the best of both worlds.
- Reheat like a pro. Pop leftovers in an air fryer or oven to bring back the crunch.
Pro tip: Make a double batch and freeze half! You can reheat them straight from frozen — perfect for lazy Sunday snacking.
A Little Restaurant Inspiration
If you’re a fan of comfort food with a gourmet twist, you’ll love our restaurant’s version — the Cheesy Chicken Rolls. They take the same golden, cheesy concept but wrap it in a soft tortilla with sweet herbs and seasoning. It’s like a fritter-meets-burrito situation, and honestly, it’s hard to stop at one.
It’s a fun reminder that great food doesn’t have to be complicated. Sometimes, all you need is cheese, chicken, and a little frying oil to make something special.
Final Thoughts: Comfort Food Done Right
So yeah, these Cheesy Chicken Fritters are everything comfort food should be — crispy, cheesy, and packed with flavor. They’re easy enough for a weeknight dinner but tasty enough to serve at a get-together.
Next time you’ve got leftover chicken, don’t even think about tossing it. Just grab your cheese and skillet — your taste buds will thank you.
And fair warning: once you make these, everyone’s going to start “dropping by” your kitchen a lot more often.