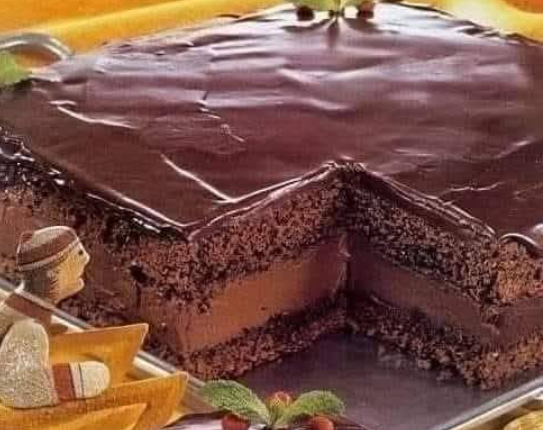
Okay, listen. If you’re looking for a fancy-pants cake with weird ingredients like goat’s milk foam or hand-harvested unicorn dust—this ain’t it. This is your good ol’ fashioned, chocolate-packed, face-meltingly good Chocolate Layer Cake Recipe. Like, the kind that makes birthdays feel extra special, breaks up boring Tuesdays, or says “I love you” in frosting.
Honestly, when I baked this last weekend, my neighbor “accidentally” stopped by twice. Coincidence? I think not.
Let’s get into it!
Why This Chocolate Layer Cake Rules
First off—it’s chocolate. So, that already bumps it up about ten points. But here’s what makes this cake a total crowd-pleaser:
- Moist (I know, people hate that word, but come on—it is!)
- Rich without being over-the-top
- Layers like a dream—no sliding, no mess
- You can make it ahead (yes, you can chill)
- Frosting? Straight-up silky and addictive
This cake hits all the marks. It’s not some dry, sad store-bought thing with plastic roses. It’s the real deal. Like, grandma-approved level of real.
Ingredients You’ll Need (Nothing Wild, Promise)
For the cake:
- 1 ¾ cups all-purpose flour
- ¾ cup unsweetened cocoa powder (get the good stuff, it matters here)
- 2 cups sugar
- 1 ½ tsp baking powder
- 1 ½ tsp baking soda
- 1 tsp salt
- 2 eggs (room temp, makes it easier to mix)
- 1 cup buttermilk (or regular milk with a splash of vinegar if you’re stuck)
- ½ cup vegetable oil
- 2 tsp vanilla extract
- 1 cup hot coffee (trust me—this is the secret weapon)
For the frosting:
- 1 cup (2 sticks) unsalted butter, softened
- 3 ½ cups powdered sugar
- ½ cup cocoa powder
- ½ tsp salt
- 2 tsp vanilla extract
- ¼ cup heavy cream (more if you like it fluffier)
Step-by-Step: How to Make This Chocolate Layer Cake
Step 1: Preheat and Prep
Set your oven to 350°F. Grease and flour two 9-inch round cake pans. Or use parchment paper if you don’t wanna deal with the cake sticking (been there, done that).
Step 2: Mix the Dry Stuff
In a big bowl, whisk the flour, cocoa powder, sugar, baking soda, baking powder, and salt. No need to sift unless you’re feeling extra fancy.
Step 3: Add the Wet Stuff
Throw in the eggs, buttermilk, oil, and vanilla. Beat until smooth. Then pour in the hot coffee slowly and mix until everything’s combined. It’ll look kinda runny—don’t panic. That’s exactly what you want.
(Real talk: That coffee trick? Game-changer. It deepens the chocolate flavor like nothing else.)
Step 4: Bake It
Pour the batter evenly into your pans. Bake for about 30–35 minutes. Stick a toothpick in the middle—if it comes out clean (or just a crumb or two), you’re golden.
Let the cakes cool in the pans for 10 minutes, then turn them out onto wire racks. Cool completely before frosting—like, all the way. Trust me, warm cake + frosting = slip-and-slide disaster.
Let’s Talk Frosting (Because It’s Half the Fun)
In a large bowl, beat the softened butter until it’s smooth and creamy. Add the cocoa powder, powdered sugar, salt, vanilla, and cream. Start slow (unless you like a powdered sugar cloud in your kitchen) then go full speed for about 3–4 minutes until fluffy.
If it’s too thick, add a splash more cream. Too thin? More sugar. Easy peasy.
How to Build That Dreamy Layered Look
Put one cake layer down. Spread a thick layer of frosting on top. Plop the second cake on and cover the whole thing with frosting—top, sides, all of it. Use a butter knife, offset spatula, or honestly, even the back of a spoon.
Wanna go extra? Sprinkle chocolate shavings or mini chips on top. I once used crushed Oreos. Zero regrets.
Make It Ahead (and Freeze Like a Pro)
You can totally make the cake layers ahead and freeze ’em. Just wrap tightly in plastic and then foil. Defrost on the counter when you’re ready.
Frosting? Whip it up fresh—it’s better that way.
Final Thoughts (aka: Let’s Eat)
There’s just something about a homemade chocolate layer cake that hits different. You can feel the love in every bite. It’s rich, soft, a little messy, and totally worth licking the spoon for.
Whether you’re celebrating something big or just in the mood for something sweet—this recipe’s got you.
And hey, if you eat a slice for breakfast the next day… I’m not judging. In fact, I support you.

Leave a Reply