Okay, real talk? I didn’t always care about potatoes. I know, shameful. But once I made these sheet pan scored potatoes, everything changed. Like, game over. The crunchy ridges, those buttery-soft insides—ugh, it’s a total flavor bomb. And here’s the best part: it’s all done on one pan. Yup, just one. Which means fewer dishes and more couch time.
If you’ve never scored a potato before, don’t worry—it’s not some Top Chef challenge. It’s actually super easy, and the payoff is chef’s kiss. So let’s break it down like we’re all hanging out in my kitchen, drink in hand, oven preheating.
What the Heck Are Scored Potatoes, Anyway?
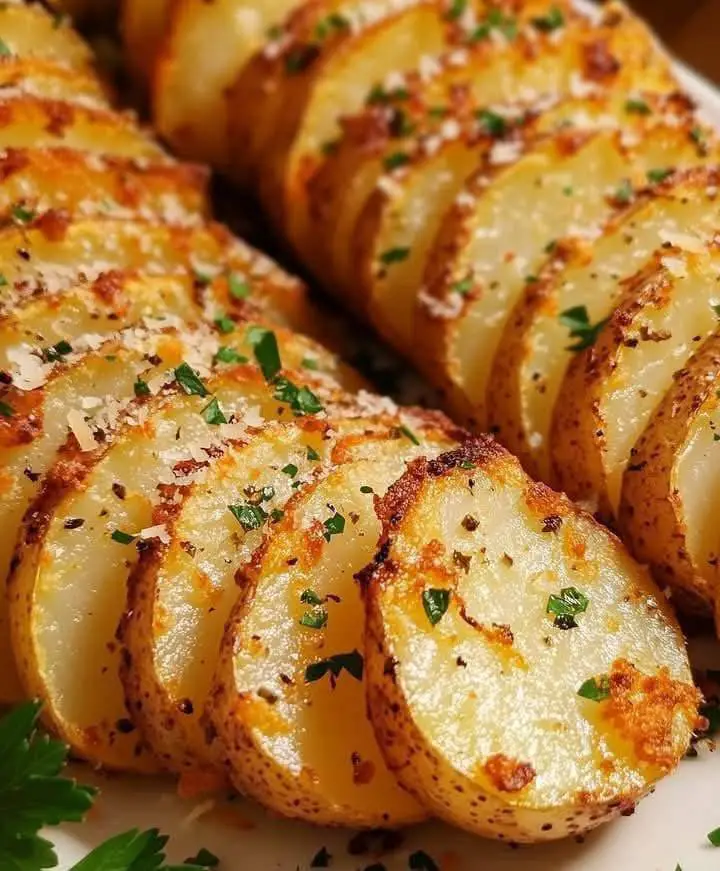
So, you take a potato (Yukon Golds are my go-to, but russets work too), and instead of just slicing it or dicing it like usual, you make these little shallow cuts across the surface—kind of like a checkerboard. It helps them crisp up in the oven like crazy while soaking in all that buttery, garlicky flavor. You get all these extra golden edges, and I mean… who doesn’t want more crispy bits?
It’s like hash browns and baked potatoes had a baby—and that baby grew up to be a total rockstar.
Why Sheet Pan Is the Way to Go
Let’s be honest: roasting stuff in a skillet sounds fun until you’re stuck scrubbing it later. Sheet pans, though? Straight-up lifesavers. You get even heat, tons of space to spread the potatoes out (so they don’t steam each other—nobody wants soggy spuds), and cleanup is stupid-easy if you throw down some parchment or foil.
Plus, if you’re feeding a crowd—or, y’know, just yourself with leftovers for days—a big ol’ pan of potatoes is a solid move.
Ingredients You’ll Need (Nothing Fancy, Promise)
Here’s the basic breakdown:
- 6 medium Yukon Gold potatoes (or russets if that’s what you’ve got)
- 3 tablespoons olive oil (the good stuff if you have it—but no pressure)
- 3 tablespoons melted butter (salted is my jam)
- 4 garlic cloves, minced (don’t skimp here)
- 1 teaspoon kosher salt
- ½ teaspoon black pepper
- ½ teaspoon smoked paprika (adds that ooh what’s that flavor? vibe)
- Fresh rosemary or thyme (optional, but so worth it)
- Grated Parmesan or pecorino (also optional—but c’mon, cheese)
You can totally riff on this. Want to throw some chili flakes in there? Do it. Want to go wild with a squeeze of lemon at the end? I see you.
Step-by-Step: Crispy Potato Glory
Let’s get this party started:
1. Preheat the Oven
Crank it to 425°F. You want that high heat to get the bottoms golden and the tops all nice and crispy.
2. Prep the Potatoes
Scrub ’em clean (no need to peel unless you hate fun). Slice each one in half, flat side down. Then, take a sharp knife and score the tops in a crisscross pattern. Just go about ¼ inch deep—don’t go full Edward Scissorhands.
3. Flavor Time
In a bowl, mix up the olive oil, melted butter, garlic, salt, pepper, and paprika. If you’re using herbs, toss those in too. Brush or spoon that mix all over the potatoes, especially into the cuts.
Pro tip: Spoon a little extra underneath each one. That buttery puddle turns into a golden crust. I swear it’s magic.
4. Sheet Pan Setup
Line your pan with parchment or foil (hello, easy cleanup). Arrange the potatoes cut-side-up, spaced out so they’re not crowded.
5. Bake Away
Roast for 35–45 minutes, depending on how big your taters are. The tops should look golden and a little puffed up, and the bottoms? Oh man—they’ll be caramelized and crisp.
You’ll know they’re done when the whole kitchen smells like garlic heaven and you can’t stop peeking through the oven window like a kid on Christmas morning.
Optional (But Amazing) Finishers
Alright, once they’re out of the oven, this is where you can level things up just a smidge:
- Sprinkle with grated Parmesan while they’re still hot. It melts into the cracks and gives this nutty little crust. So good.
- Fresh herbs—a sprinkle of chopped parsley, chives, or even dill gives it a fresh pop.
- Dips—I’m partial to sour cream mixed with a little horseradish, or Greek yogurt with lemon and chive. Ranch? Always welcome.
When to Serve These Bad Boys
Honestly? These potatoes don’t care what time it is. Here’s when I’ve made them:
- Sunday night roast dinner—with chicken or beef and some greens on the side.
- Tailgating snacks—cut them smaller and dunk them in all the sauces.
- Late-night “I just want carbs” cravings—don’t judge, just eat.
- Holiday spreads—they look way fancier than the work they take.
They’re the kind of side that steals the show. I mean, I’ve made them for Thanksgiving and folks ignored the turkey. Not even mad about it.
Quick Tips So You Don’t Mess It Up (I Got You)
- Don’t skip the scoring. That’s what makes the texture go wild.
- Use parchment. Trust me, you do not want to scrape stuck-on potato off your pan at 10 p.m.
- Don’t crowd the pan. Give those babies room to breathe or they’ll steam instead of roast. Spread them out like you’re social distancing in 2020.
- Flip halfway? Totally optional. I like to keep the pretty scored tops up the whole time, but if you’re all about extra crisp bottoms, go for it.
Leftovers? Heck Yes.
Got leftovers? First of all—lucky you. Second, these reheat like a dream.
Just pop them back on a sheet pan and warm in the oven at 375°F for 10–15 minutes. Or toss them in the air fryer if you’ve joined that club. Do not—I repeat, do NOT—microwave them unless you like soggy sadness.
I’ve even smashed the leftovers into a skillet with a fried egg on top for breakfast. It’s like a fancy diner hash, but way less greasy.
Final Thoughts (aka Just Make These)
Look, I know potatoes aren’t flashy. But these sheet pan scored potatoes? They’re a low-key masterpiece. Crispy, buttery, garlic-loaded, and easy enough to throw together on a weeknight.
They’ll win over picky eaters. They’ll impress your foodie friends. And most importantly, they’ll make you feel like a kitchen wizard—with basically zero stress.
Try ’em once, and I swear, they’ll be on repeat at your house too.
Leave a Reply