Okay, real talk—cheesecake used to scare the heck outta me. Something about the water bath, the cracking, the waiting. But after a few (okay, like seven) kitchen meltdowns and a whole lot of cream cheese, I finally nailed the traditional cheesecake recipe that comes out rich, smooth, and creamy every single time. And hey, it’s not as complicated as everyone makes it sound.
Whether you’re baking for a holiday, a birthday, or honestly just because you want a dang slice of cheesecake on a Tuesday night—this one’s for you.
Why Traditional Cheesecake Is Worth It
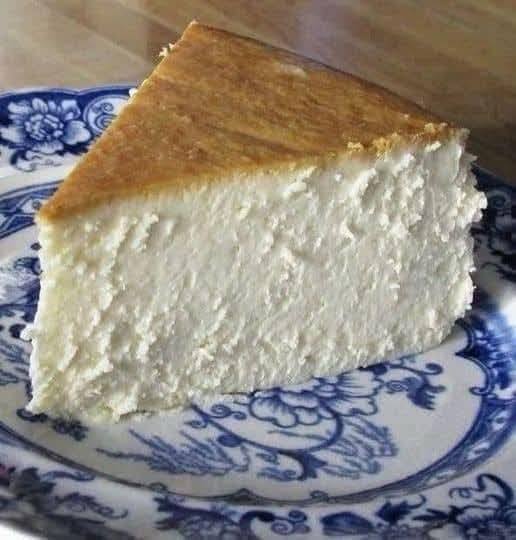
You know those store-bought cheesecakes that look all fancy but taste kinda… meh? Yeah, this ain’t that. A homemade traditional cheesecake hits different. The texture is dense but still silky. The flavor? Tangy, slightly sweet, and downright comforting.
It’s one of those desserts that feels like a hug in cake form. And don’t worry—we’re keeping it simple but still sticking to the good ol’ way of making it. No shortcuts that mess with the flavor.
Ingredients – Keepin’ It Classic
Here’s what you’ll need. Nothing wild—just the good stuff.
For the crust:
- 1 ½ cups graham cracker crumbs
- ¼ cup white sugar
- 6 tbsp unsalted butter, melted
- Pinch of salt (trust me, makes a difference)
For the filling:
- 4 blocks (8 oz each) cream cheese, room temp
- 1 cup white sugar
- 1 cup sour cream
- 1 tsp vanilla extract
- 4 large eggs, room temp
- 1 tbsp flour (optional—helps prevent cracks, but not a must)
That’s it. No weird ingredients. No gelatin. No guesswork.
Step-by-Step: How to Make This Cheesecake Without Stressing Out
I’m not here to stress you out. I’m here to walk you through this like we’re baking in my kitchen, drink in hand, chatting about how crazy this week has been.
Step 1: Prep your pan and oven
Start by preheating your oven to 325°F. Then, grab a 9-inch springform pan. You can use a regular pan, but springform really makes life easier when it’s time to slice.
Wrap the outside of the pan with foil (yep, foil armor) so no water leaks in later. Spray the inside lightly with cooking spray.
Step 2: Make the crust
Mix up your graham cracker crumbs, melted butter, sugar, and salt. Press that into the bottom of the pan nice and even. Use the bottom of a glass if you want it super smooth.
Pop it in the oven for 10 minutes. Then let it cool while you whip up the filling.
Step 3: Blend that creamy filling
In a big ol’ bowl, beat the cream cheese until it’s nice and fluffy. Add the sugar and mix again. Then stir in the sour cream and vanilla.
Now, here’s the trick: Add the eggs one at a time, mixing on low. We don’t wanna beat a ton of air in—air causes cracks.
Optional: add that spoonful of flour here if you’re nervous about cracks. I won’t judge.
Step 4: Pour and prep the water bath
Pour that dreamy filling right on top of your crust. Place the pan in a larger roasting pan or baking dish. Fill that outer pan with hot water—about halfway up the springform pan.
Don’t skip this part. It’s how we get that smooth top without a canyon-sized crack.
Step 5: Bake and chill (literally)
Bake at 325°F for about 1 hour and 10 minutes. It should jiggle slightly in the middle when you give it a lil’ shake.
Now turn off the oven and let it sit in there for another hour. Don’t open the door! Cheesecake hates sudden changes (kinda like me before coffee).
After that, cool it on the counter for 30 minutes. Then chill it in the fridge for at least 4 hours—or better yet, overnight.
Quick Tips If You’re in a Time Crunch
Okay, I know not everyone has all day to babysit a cheesecake. Here’s how to make this a bit quicker (without wrecking it):
- Make it the night before. You can sleep while it chills—easy.
- Skip the water bath if you don’t care about cracks. It’ll still taste amazing.
- Use a pre-made graham crust if you really, really need to save time. I’ve done it in a pinch, no shame here.
- Slice with a hot knife. Run a knife under hot water, wipe, slice. Repeat. Makes those cuts look pro—even if you’re not.
Toppings? Oh Heck Yeah.
This cheesecake is a beauty on its own, but toppings take it over the top. Here are a few crowd-pleasers:
- Fresh strawberries or raspberries (classy and easy)
- Blueberry compote (just simmer berries with sugar and lemon juice)
- Chocolate ganache (because why not?)
- Crushed Oreos or toffee bits (for when you’re feelin’ fancy)
Heck, once I topped mine with crumbled peanut butter cups and it was gone in 10 minutes flat. Not even kidding.
Final Thoughts (and Maybe a Cheesecake Craving)
Honestly, if I can make this traditional cheesecake recipe work—without burning it or crying halfway through—so can you. It’s way more forgiving than people think. And when you slice into that first bite? You’ll get it. That creamy, smooth, rich flavor is everything.
So go ahead, preheat that oven, and treat yourself. Because honestly? Life’s too short to skip dessert.
Leave a Reply